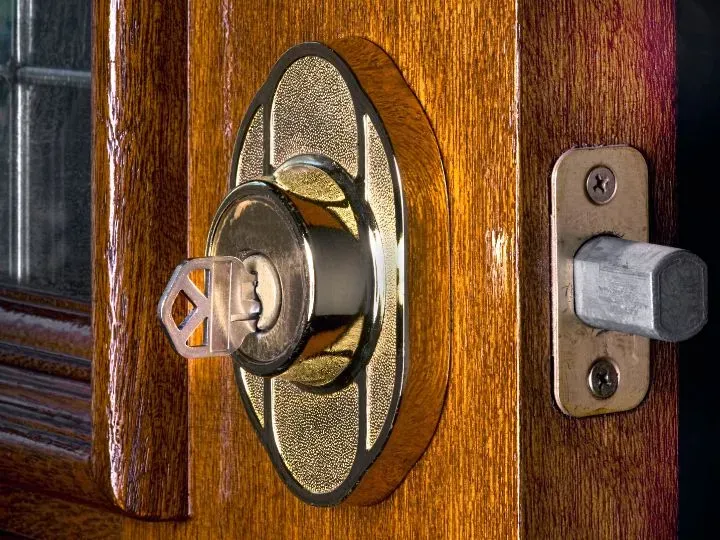
A deadbolt adds an extra layer of security to your home by making it harder for someone to force open an exterior door. If you’re considering installing one, choosing the right lock and following the correct steps can help you improve your door’s security without creating problems with alignment or operation.
In this guide, we’ll explain how to install a deadbolt lock, what tools you’ll need, how to choose the right type, and when it makes sense to call a professional locksmith. These steps can help you determine whether the project is manageable as a DIY task or requires expert assistance.
Why Install a Deadbolt Lock?
Deadbolts provide significantly more security than standard doorknob locks. Unlike spring-loaded locks that can be easily compromised, deadbolts require deliberate action to unlock and cannot be opened by simply pushing or manipulating the bolt. They’re an essential component of home security, often required by insurance companies and building codes.
What You Need Before Installing a Deadbolt
Before starting, make sure you have the correct deadbolt for your door and the tools needed to install it. Preparing everything in advance can help prevent mistakes and make the process more straightforward.
Common tools and supplies include:
- A deadbolt lock kit with its installation template
- A tape measure and pencil
- A drill and the appropriate hole saw and drill bits
- A screwdriver
- A chisel and hammer, if the door requires additional space for the strike plate
- Safety glasses
Check the lock manufacturer’s instructions before drilling. Door thickness, backset measurements, and bore-hole dimensions can vary between products.
Choosing the Right Deadbolt
Single vs. Double Cylinder
Single cylinder deadbolts have a key on the outside and a thumb turn on the inside. They’re easier to use in emergencies but can be vulnerable if an intruder breaks nearby glass.
Double cylinder deadbolts require a key on both sides, providing better security but potentially creating safety concerns during emergencies.
Grade Ratings
Look for ANSI (American National Standards Institute) grades:
- Grade 1: Highest security, commercial quality
- Grade 2: Good residential security
- Grade 3: Basic residential use
Step-by-Step Installation Process
Step 1: Measure and Mark
Start by determining the proper height for your deadbolt. Standard placement is 6-12 inches above the existing doorknob, typically around 44-48 inches from the floor.
- Measure and mark the center point on the door edge where the deadbolt will be installed
- Use the template provided with your deadbolt kit to mark the exact drilling points
- Mark both the face of the door (for the cylinder) and the edge (for the bolt)
- Double-check all measurements before drilling
Step 2: Drill the Cylinder Hole
This is the most critical step in the installation process.
- Put on safety glasses
- Using a 2-1/8″ hole saw or spade bit, drill from one side of the door until the pilot bit just breaks through the other side
- Stop drilling and move to the other side of the door
- Complete the hole by drilling from the opposite side to prevent splintering
- Test-fit your deadbolt cylinder to ensure proper sizing
Step 3: Drill the Bolt Hole
- From the edge of the door, drill a 1″ hole into the center of the cylinder hole you just created
- Drill carefully to keep the hole straight and level
- The depth should accommodate the entire bolt mechanism (usually 1-2 inches)
Step 4: Install the Bolt Assembly
- Insert the bolt assembly into the edge hole
- Position the faceplate flush with the door edge
- Trace around the faceplate with a pencil
- Use a chisel to create a shallow recess for the faceplate so it sits flush
- Secure the bolt assembly with the provided screws
Step 5: Install the Cylinder
- Insert the exterior cylinder through the large hole from outside the door
- Ensure the tailpiece extends through the bolt assembly
- Install the interior cylinder or thumb turn assembly
- Align all components properly before tightening
- Secure with the provided screws, but don’t overtighten
Step 6: Test the Lock
Before proceeding to the strike plate installation:
- Test the lock mechanism with the door open
- Ensure the bolt extends and retracts smoothly
- Check that the key works properly from the outside
- Verify the thumb turn (if applicable) operates correctly
Step 7: Install the Strike Plate
- Close the door and turn the deadbolt to mark where it hits the door frame
- Measure and mark the strike plate position on the door jamb
- Drill a 1″ hole into the door jamb at the marked location
- Chisel out a recess for the strike plate to sit flush with the jamb
- Secure the strike plate with long screws that reach into the wall stud for maximum security
Step 8: Final Adjustments
- Test the complete installation with the door closed
- Ensure the bolt slides smoothly into the strike plate
- Check that the door closes and opens properly
- Make any necessary adjustments to alignment
- Apply a small amount of graphite lubricant to the key and lock mechanism
Common Installation Challenges and Solutions
Misaligned Holes
If your holes don’t line up perfectly, minor adjustments can be made with a file. For major misalignments, you may need to fill the holes with wood putty and re-drill.
Door Warping
Older doors may have slight warping that affects bolt alignment. This might require adjusting the strike plate position or shimming the door frame.
Splintering
Always drill from both sides when making large holes, and use sharp bits to minimize splintering. If splintering occurs, it can often be hidden by the deadbolt hardware.
Security Tips for Maximum Protection
Use Long Screws
Replace the standard screws in the strike plate with 3-inch screws that penetrate into the wall stud. This prevents the door frame from being kicked in.
Consider Door Reinforcement
For maximum security, consider installing a door reinforcement kit that strengthens the area around the deadbolt.
Regular Maintenance
Lubricate the lock mechanism annually with graphite (never oil, which attracts dirt) and check that all screws remain tight.
When to Call a Professional
While many homeowners can successfully install a deadbolt, certain situations require professional expertise:
- Metal doors or frames
- Complex door configurations
- Historical or expensive doors where mistakes could be costly
- Installation of high-security or electronic deadbolts
- When you’re not comfortable using power tools
- If you encounter structural complications during installation
Ensuring Long-Term Security
A properly installed deadbolt can provide years of reliable security. However, remember that your door’s security is only as strong as its weakest component. Consider the overall security of your door, frame, hinges, and surrounding structure.
Regular maintenance and periodic security assessments can help ensure your investment in home security continues to protect your family and property effectively.
Need Professional Installation or Have Questions?
While this guide provides comprehensive instructions for DIY installation, some homeowners prefer the peace of mind that comes with professional installation. If you’re in the Rockland County area and need expert locksmith services, Driscoll’s Lock & Key has been serving the community since 1968. Their experienced technicians can ensure proper installation and provide guidance on the best security solutions for your specific needs. Whether you need a simple deadbolt installation or a complete security assessment, professional locksmiths can save you time and ensure the job is done right the first time.
Frequently Asked Questions
Can I install a deadbolt lock myself?
Yes, some homeowners can install a deadbolt themselves, particularly when the door already has compatible openings. The work requires accurate measurements, suitable tools, and careful attention to the manufacturer’s instructions. A locksmith can help if the door needs modifications.
How long does it take to install a deadbolt?
Installation time depends on the lock, door material, and whether the required holes and strike-plate recess are already in place. A straightforward replacement may take less time than installing a deadbolt on a door that needs new openings.
What is the best type of deadbolt for a front door?
The right deadbolt depends on the door, the hardware’s security rating, and your household’s needs. A single-cylinder deadbolt is commonly used on residential entry doors because it has a keyed exterior and an interior thumb turn. Consider emergency-exit safety when choosing any lock.
Why does my new deadbolt stick when I close the door?
A deadbolt may stick because the bolt and strike plate are misaligned, the door has shifted, or the hardware was installed incorrectly. Check the alignment and the manufacturer’s instructions. If the lock still binds, a locksmith can identify the cause and make the necessary adjustments.
Should I replace the strike plate when installing a new deadbolt?
Inspect the existing strike plate and its screws before reusing them. If the plate is damaged, incompatible with the new lock, or poorly secured, replacement may be appropriate. Follow the deadbolt manufacturer’s recommendations for the correct strike plate and fasteners.